Pages

Showing posts with label crafts. Show all posts

Tuesday, October 25, 2011

This is Halloween!!

Me and the kiddos busted out some of the Halloween decor earlier this month. I don't have much in the way of Halloween stuff. Since I've had the kiddos I seem to be adding a little each year.


This Halloween tile is one of my additions this year!! I won a giveaway from the super cute blog Cee Cee's Corner! Claudia has great recipes, ideas, and tips. She even has a super cute (and FREE) subway art download for Halloween. If you haven't checked out Cee Cee's Corner yet be sure to head over there!!


Here is a look at my ledge decked out for Halloween.


My favorite Halloween item would for sure be my talking skeleton. When you walk by he says "Good Evening", rattles his jaws, and tips his hat. My Grandpa was HUGE into Halloween. It was one of his favorite holidays. He was a prankster and loved scaring people. He had this skeleton hanging in his house and I would jump almost every time. After my Grandpa passed away my Grandma stopped going all out like he would. I was super excited when she said I could have the skeleton. Halloween isn't the same without you Pa!


I'm linking this to: Sugar Bee Crafts, My World Made By Hand, Keeping It Simple, Night Owl Crafting, Crafty Confessions, What Allie Makes, Sassy Sites, and Frugalicious Me.

Friday, July 1, 2011

Last Minute 4th Stuff

When I was at our book club this week, my cousin asked if I would make some hair bows for her little girlies. I haven't made lots of bows but thought why not. I came home and went to MnM's hair bows for inspiration. Her adorable dance teacher makes the cutest bow I've ever seen! I decided to try something along those lines. I think they turned out pretty cute considering I'm still a beginner!


My Sissy wanted to make a wreath for her front door. She wanted to do something quick and patriotic. I saw an adorable wreath
from The Cellar Door Stories while browsing through Night Owl Craftings link up this week. My Sissy LOVED it when I showed her.

We took a trip to our Granny's house for some yarn. I happened to have an extra wreath laying around that I didn't know what to do with. Sissy came back to my house and went to town. I took a picture as she was leaving of her finished project. Too too cute! I'm going to have to make me one of these for sure!!

The best part of both these projects is they were totally free!!

Monday, June 27, 2011

Ribbon Star

With the 4th quickly approaching I thought I would show you the post I did over at Made It On Monday over the weekend. I was inspired back in February from wreaths I saw at Tatertots and Jello and She's Kinda Crafty. Some of you may remember the ribbon heart I made. Today we are going to make *star*.

Supplies for ribbon star
  • a flat, square surface (ie tile, cardboard, plate)
  • glue gun
  • red, white, and blue ribbons
  • alphabet letters
  • scrapbook paper 
  • star embellishment
  • black marker


The first step I had to do was paint the tile I was using. If you want to make it really easy for yourself, you could purchase an already white item. I like to make things difficult for myself though. Next take your scrapbook paper and cut out two star shapes. I used my George and Basic Shapes cartridge for the cricut on mine.


Now that the easy part is done it's time for the ribbon. Not going to lie this part takes a little more time. Take your ribbon and cut 70, 4 inch strips. After the strips are cut hot glue the ends together. Separate the ribbons into two piles. One for each star.


Take your ribbons and start gluing them onto the templates. Start at each point on the star and work your way to the middle. Try and place the ribbons on as randomly as possible. That part is always difficult for me LOL. Place your star embellishment in the middle of both the stars. Hot glue the finished stars onto the surface you are putting them on. 

If you want the stars to pop a bit more, take a black marker and trace around them. The final final step is write something patriotic at the bottom with the alphabet letters. I used my cricut again but stickers would work just as well.


See isn't that darling!! I love how this turned out! I think I'm sold on the ribbon holiday decorations. Go gather up some supplies so you can quickly make one too.

I'm linking this to: I Heart Nap Time, The Tattered Tag, Keeping It Simple, Sumo's Sweet Stuff, Craft O Maniac, Sugar Bee Crafts, Blue Cricket Design, Night Owl Crafting, Making It With Allie, Sassy Sites, Tatertots and Jello

Monday, May 23, 2011

Wedding Accessories

My Sissy got married two weeks ago. She has a brand new nephew on her husbands side. I suggested that I would make him a tie onesie like the one Char at Crap I've Made has a tutorial on. My friend Aubrey made one for our friends baby shower that turned out darling! I've been wanting to try one for a long time and thought this would be a perfect project. I followed Chars instructions and printed out her template for the pattern. I have now used Heat and Bond on two projects and have decided that I don't like it. I will be buying Wonder Under next time I have an applique project. This project was super easy and I was pleasantly surprised with how cute it turned out! My Sissy's new Sis in law loved the onesie and her little baby boy looked so handsome in it!


My Sisters wedding colors were pink and brown. Her Sis in law asked that since he was a brand new baby boy, to stick with a fabric that didn't have pink. (She didn't want him to get confused for a little girl.) My silly sister forgot that request and picked up some fabric that was brown with pink polka dots. I told her we could still use it and I could make the little girls some hair flowers. I stumbled onto a blog I hadn't seen before called Fabric Bows and More. This blog is one of my new favorites! I found a darling bow tutorial from Cute As A Fox that was done with ribbon. I knew I could make  that one work.


I started by making a fabric rosette. Once the rosette was done I followed the tutorial from Cute As A Fox. I did mine slightly different since I was putting the rosette in the middle. When I had my strand gathered I formed it into a circle and hot glued it together so it would hold the circle shape. I then took the circle and hot glued it to the bottom of the rosette. I needed something for the middle so I went to my bead stash and found some light pink beads. I threaded the beads onto some wire and formed a circle. Then I hot glued the beads to the middle of the rosette. The last thing I did was take some felt and made two circles. I hot glued one to the bottom. I then took my alligator clip and hot glued it onto the felt with the clasp open. I took the last piece of felt and slipped it inside the clasp then glued it down. I was super pleased with these little flowers. They looked darling in the little girls hair! MnM LOVED hers!

I'm linking this to I Heart Nap Time, Keeping It Simple, Sugar Bee Crafts, Night Owl CraftingLil LunaBlue Cricket Design, House of Hepworths, Sassy SitesMaking It With Allie, Wildflowers and Whimsy, and The Tattered Tag.

Sunday, April 17, 2011

Old/New Easter Wreath

Not so darling anymore!
I bought a darling Easter wreath a few years ago at TJ Maxx. The wreath structure was foam that over the years had really worn out. The poor little eggs kept falling off and didn't have anything to hold them in place.


I went to Joann's and bought a new round foam wreath for $5. I was going to pick up another white boa but the cheap thrifty side of me couldn't see spending that much to fix this little wreath. I decided to take one of Old Mac's old white shirts and cut it up. I tied the strips around the wreath.


Once I had the whole thing covered I figured where I wanted the eggs to be placed. I also put hot glue at the base of the eggs. The final thing I did was took a strip of ribbon and glued the ends together. I made a knot so there was a loop to hang the wreath from. I'm so pleased with how it turned out!! I think it's just as cute as the original! 

The Dollar Store has darling eggs right now that have sticks on the ends. If you are wanting to make one before Easter next week, those would work perfect! 

Visit thecsiproject.com


Tuesday, April 12, 2011

Temple Blocks


I showed you all the last craft that I came up with for my wards Enrichment Night activity. We have our next day this month. They suggested that I come up with something for Easter. I saw the perfect idea at Lil' Luna.

Kristyn and her husband took a bunch of pictures of the temples for our church and antiqued them. She also posted instructions on how to put them together. We have had 34 people sign up for this activity. Most of the ladies are making more than one of these. (I actually made one for my sissy for part of her wedding shower gift.)

For the wood hubby suggested using mdf because it's cheaper and would work just as well. I bought one big sheet of it at Lowe's. We had the Lowe's guy cut the sheet into 7 inch wide strips. Old Mac cut the strips into the blocks at home. I even used a belt sander to sand them all down. I'm super excited for our craft night this month!! I can't wait to see how all the blocks turn out!

 This craft ended up being about $2 a block.

Monday, February 14, 2011

HOOO Loves You

Happy Valentine's Day everyone!!

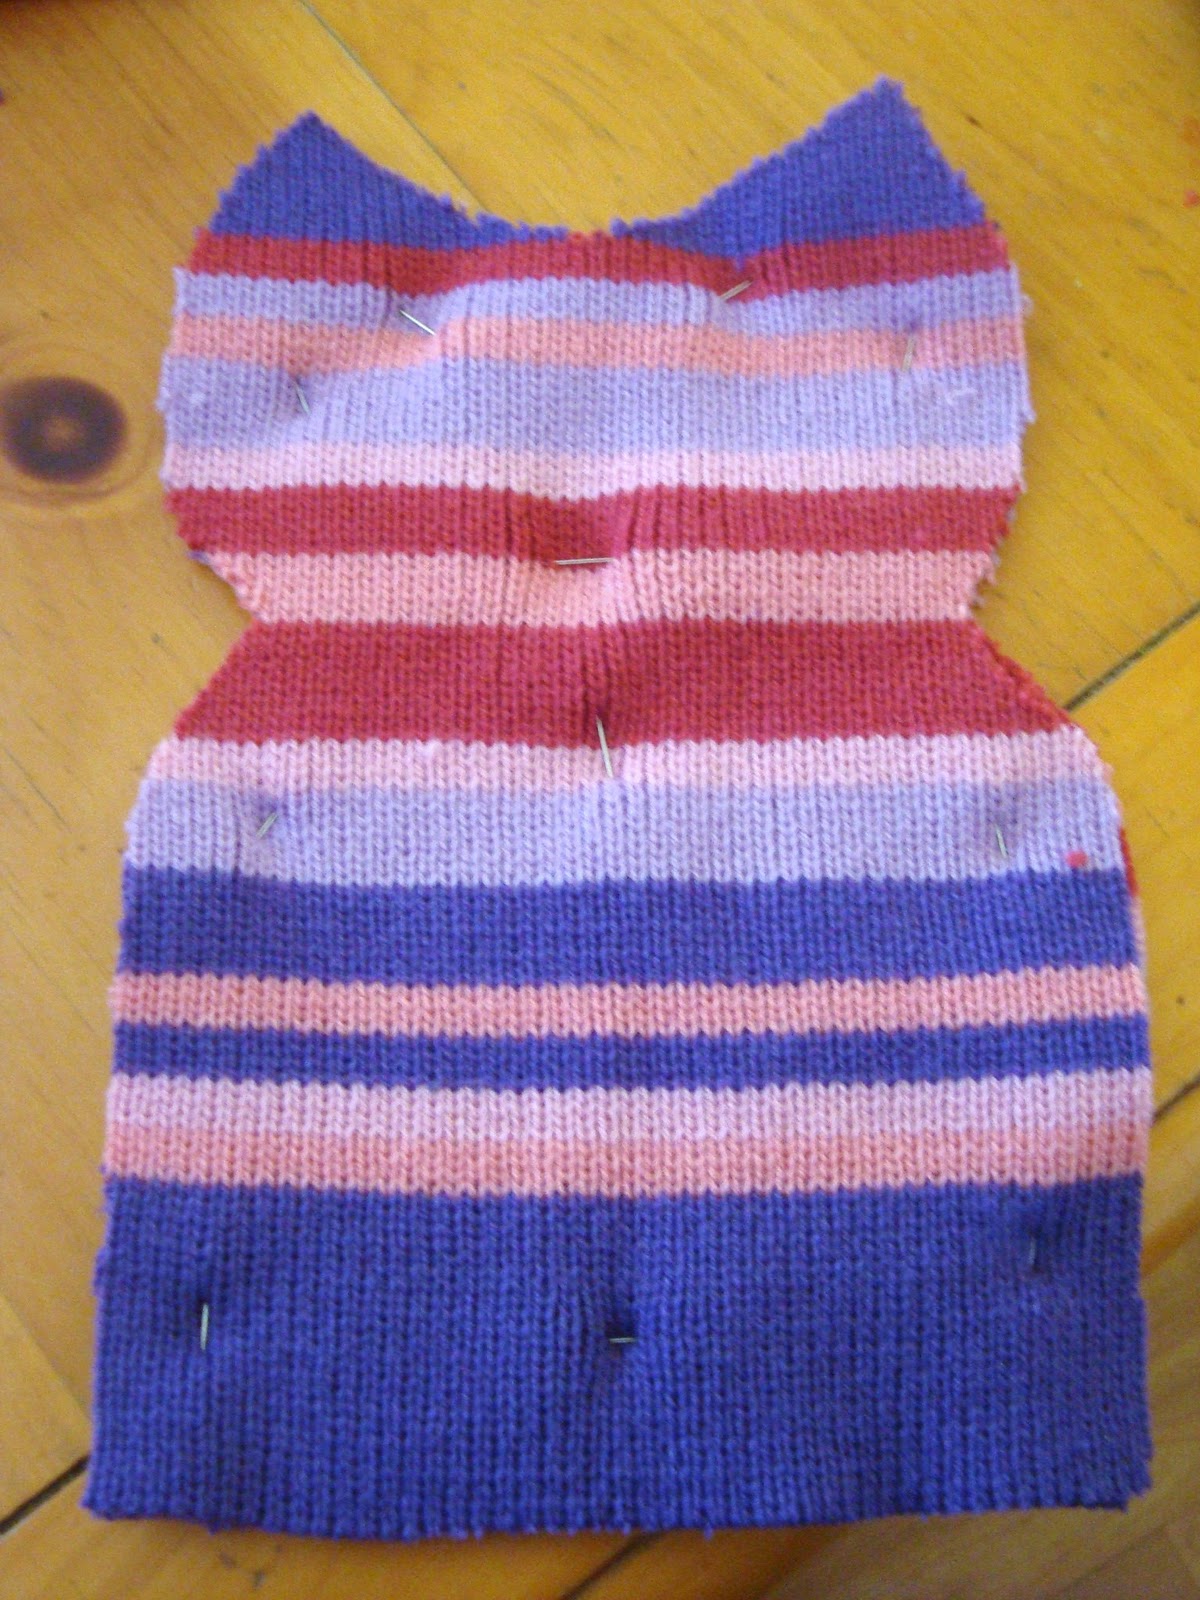
Old Mac gets the kids a stuffed animal every year for Valentine's . Owls seem to be HUGE right now so I decided to see if I could make one. I told Old Mac that if he couldn't tell what it was when done he could go get them an animal from the store. Tee Hee.

I had an adorable owl done by Ashley at Make it and Love it saved in my "to do" folder. It didn't look too difficult so that was the one I decided to try. I followed all the steps on her tutorial and it was actually super easy! I don't know all the proper lingo for sewing and would probably have you totally lost in a matter of minutes. Thanks to Ashley you can just follow her awesome steps!! She even has a great one for hand stitching in case you need help with that too.


This little project only took me a few hours yesterday to work on. I already had the old scarfs stashed away. I also had a few felt scraps but not enough. I went to Dollar Store over the weekend and discovered they had a stack of felt. The colors were limited but I knew they would work. I could have gone to the craft store and bought the sheets there, but this gives me lots of extras for future projects. I hand stitched the wings and nose on but hot glued the eyes.

This little project turned out super cute and Old Mac knew what it was supposed to be. I only spent a grand total of $1 for this little craft! The kiddos will be getting them for Valentine's Day later today!!

I'm linking this to Allie Makes, Wildflowers and Whimsy, I heart nap time, Sumo's Sweet Stuff, Keeping it Simple, Sugar Bee, Craft O Maniac, Not Just a Housewife, Sassy SitesSister's StuffBlue Cricket, Saturday Mornings, Tatertos and JelloHouse of Hepworths, and Night Owl Crafting.

Friday, February 11, 2011

Secret Sister Gift


MnM needed a secret sister gift that couldn't be more than $5. I decided that since I loved my rosette frame an 11 year old might love one too. After I got approval from the diva we got to work. I used the leftover fabric and buttons that I already had. I bought a new frame and then popped on some stickers. A few months ago one of my friends found an AWESOME website that sells hair flowers for wholesale prices. We made a large purchase together so that we would only pay one shipping fee. After I had all the flowers assembled (and realized we had a bazillion) I set aside some for birthday parties. We went to our flower stash and got a few of the smaller ones to put with the gift. Since the secret sister MnM was given is older I didn't think she would want huge ones. This was a super quick little project. Since I was pretty much using up things I already had it was a minimal cost. I think it turned out to be a darling little secret sister gift!!

I linking this up to Allie Makes, Wildflowers and WhimsySaturday MorningsI Heart Nap Time, Keeping It Simple, Sumo's Sweet Stuff, Craft O Maniac, Sugar Bee, Night Owl Crafting, Not Just a Housewife, Blue Cricket, Sisters Stuff, House of HepworthsSassy Sites, and Tatertots and Jello.

Wednesday, February 9, 2011

What time is it??? Party time!!!

It's party time at Night Owl Crafting!! Have you been over and check out the giveaways yet? There are some awesome things!! I have my eye on the pillows and necklaces from yesterday. I also LOVE the frame from this morning. My little giveaway is going on right now so hurry over and enter to win it!!


In case you haven't yet, here is what I'm giving away: a magnet recipe frame with two rosette magnets, two dish towels, and two dish towel holder ties. I'm so excited to not only be doing my first giveaway, but to be doing it over at Night Owl Crafting!!! Put on your party pants and head over there. You have until Sunday to enter!!

Sunday, February 6, 2011

Song Quote Saying

(First off I apologize that I'm posting this a day later than I said I would. I am so glad this week is over.)

When Old Mac and I were married we had the 311 version of "Love Song" playing. I thought it would be fun to incorporate some part of the song in our room somehow.
The first thing I did was take one of the tiles (from the never ending stack of leftover Barbie tiles) and spray painted it white like I did the ribbon heart.
I then got on the phone and called up my sis in law Candy and asked if I could borrow a cricut cartridge. (I only have the Basic George and am getting pretty darn tired of it.) She let me borrow her Opposites Attract cartridge which I totally need to invest in.
The last part was printing out the line of the song I wanted and then gluing it down.
This was another super quick, easy, and FREE craft!! I won't get mushy but I also love that it has meaning for me and Old MacDonald.

I am linking this up to Wildflowers and Whimsy, I Heart Nap Time, Sumo's Sweet Stuff, Craft O'Maniac, Sugar Bee, Not Just a Housewife, Sisters Stuff, House of Hepworths, Sassy Sites, Night Owl Crafting, Blue Cricket Design, Keeping It Simple, Tatertots and Jello, and Allie Makes.

Saturday, January 29, 2011

U- Create January craft

I've mentioned how much I LOVE U Create Crafts, but I'm going to say it yet again. This site is totally filled with awesomeness! A few weeks ago I found a tab I had never clicked on called: Create with me. Every month there is a featured craft that is pretty easy and inexpensive that you can follow along with. This months was a darling rosette frame that had the saying, "Keep Calm and Sew On." Can you believe I hadn't tried rosettes yet?! I was super excited to try this craft out.

This is what the frame looked like before

I bought the frame at the local thrift store and only spent $1.50. The fabric for the rosettes was from Joann's. I also tweaked the saying a tad since I'm not a sewer, and printed the lettering off my cricut. Old Mac is giving me a corner of the office as a craft area. The colors of the frame are the colors I'm going to be doing!! I'm so excited for my first completed craft area knick knack!!

I'm linking up this project to Wildflowers and Whimsy, I Heart Naptime, Keeping it SimpleSumo's Sweet StuffCraft'O Maniac, Sassy Sites, Not Just a HousewifeSisters Stuff, and House of Hepworths

Wednesday, January 26, 2011

Barbie's Crib 2

The finishing touches are being done to Barbie's crib! I had all the things purchased back when we started this little project a few months ago. Due to lack of time I had to put it on hold.

I purchased a wash cloth for the dollar store for the bathroom. I cut a strip and put it in the towel ring. I also sewed a rug and hooded towel for Barbie.

Not much happened in the bedroom but I finished sewing a comforter and a few more pillows.


In the kitchen I sewed a long rug and table cloth. I also sewed a little curtain and need to hang that above the window. Santa came through with a fridge for Christmas per MnM's request.

There are a few more things that I need to do before it is "finished". I'm really happy with the progress though and so is MnM!

Sunday, January 23, 2011

Love You Day Tree

I saw an ADORABLE Valentines tree on Tip Junkie by Sharla at My Little Gems. I have a tree that sits on my ledge that I new would be perfect to decorate for the holidays. I can't believe I hadn't thought of it before!! Since I'm cheap like to save money, I didn't want to spend a ton for the decorations. I put on my thinking cap and made all the stuff to dress it up.

I bought the fabric for the garland at good old Wally World (which has surprisingly cute fabric). I took some wire and cut the fabric into strips. I tied the strips into knots on the wire. My next stop was Michael's for the hearts. I took puff paints (that I already had) for me and MnM to write Love You Day words on. I then put ribbon on the backs so that they would hang. The last thing was the button hearts. They were a grand total of FREE hundred dollars! I took buttons and threaded them onto some wire to form a heart shape. I finished them off with some ribbon so they would hang.

This was an awesome "use what you got" project. The only things I purchased were the fabric and the hearts!

I'm linking this up this week to:
Wildflowers and Whimsy, I Heart Naptime, Keeping It Simple, Sumo's Sweet Stuff, Craft O' Maniac, Not JUST a Housewife, Sisters' Stuffand House of Hepworths.

Felt Flower Ball

I first saw this idea over at The Idea Room. She did a super cute wreath, topiary, and hanging balls. My cousin decided to try some for her house. They turned out so cute that I decided to try one too! I did a ball. I didn't read the directions first on how much felt to buy.  (Note to self always read the instructions. Hence why they are there.) I went to Wally World and bought 4 of the pre-cutout felt sheets and a bag that came with two Styrofoam balls.


I cut the felt into a flower shape instead of a circle. I then cut the flower in half and then half again. I wanted them to not be perfect circles. I took the bottom and folded it over so that it was kinda in a triangle shape. Then you take straight pins and put them through the tip of the felt and into the styrofoam. I didn't end up using all the shapes so I have some leftover for a future project! I probably only needed three sheets instead of 4.

I LOVE how it turned out! I'm going to use the extra ball and make a purple or yellow one for Easter.

Total cost for one ball $2.50

Monday, January 17, 2011

Enjoy Utah Contest

I entered the contest at Enjoy Utah for Disney on Ice tickets. The contest was for submitting an idea that would be used on Good Things Utah (a local TV show kinda like "The View" but not as catty) and Fox 13 with Big Buddah. Michelle from Enjoy Utah is going to be competing with other Mommy Utah bloggers. They are wrapping food to be donated to the Utah Food Bank. It's a timed contest so it needed to be fast, inexpensive, creative, and of course cute.

I decided to turn my thinking cap on and see what I could come up with that would be all those things. Most importantly something she could do fast. Here is what I came up with:


As you can see there is a side for Mickey, Minnie, the Mad Hatter, and Cinderella. All I used was paper and I only used items I had on hand making it a grand total of FREE hundred dollars. Tune in to Good Things Utah tomorrow morning from 10-11 and see if my idea is the one Michelle ended up using!! If you live in Utah and haven't already you need to check out Enjoy Utah!! There are some rockin' awesome ideas!!